
Two Locations: Elgin & Buffalo Grove - Come in for a FREE trial class!
STUDENT RESOURCES
HOW TO TIE YOUR BELT
STEP 1
Find the center of your belt and place it over your navel.
Side A (Red) starts in the right hand.
Side B (Blue) starts in the left hand.


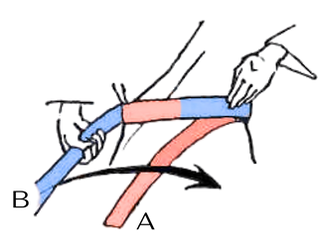
STEP 2
Take both ends around your back, crossing them behind you, and bring them back to the front.
Keep the belt flat and stacked neatly, not twisted. (Side A underneath side B)
STEP 3
Bring side B under both side A and the middle section and pull straight up.
Pull each end to the left and right to tighten.
Check that both ends are about even length.


STEP 4
Place side B on top of side A to form an "X".

Maintaining the "X", bring the tail of side A over side B and push it through the opening.

Pull each end to the left and right to tighten the knot.
STEP 5
Make sure the knot is sitting over your navel (centerline).
Check that both ends hang
to the same length.
(If not, try again from step 3)
